|
Instructions for making a home made Digital 3D ViewerItems needed:
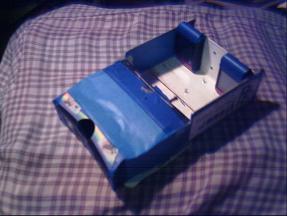
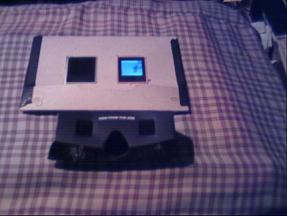
These are two examples to give a general idea of configuration. The explanation here is for a full enclosure viewer, but not as fancy as the left one above, which has the screens fixed in place on a sliding frame which makes possible focus and eye alignment. Cracker-box 3D viewer. Make two small slots or small holes (depending on your screens) in the face or back of box for inserting the part on the picture frame where the key chain attaches. These slots should be about eye width apart and near to the side, top or bottom of the box so the picture frame rests against that surface. Your choice for placement of the screens depends on the optics you use. Viewer#3 requied two pairs of viewers to be able to focus on a screen at that distance. Attach the safety pin to each ring of the key chain while you're removing it from the picture frame. Then re-attach the picture frame to the safety pin-or similar device once it has been passed though the slot. Insert the picture frame eyelet through the slot in the box and secure it with the pin. The picture frame should hang with its back resting agains the box. It is best to secure the frames in place to keep them from moving and to keep them properly aligned. You can do this with a piece of velcro or double stick tape o a dab of glue depending on how you configure your viewer. Remember that access to the on off button and the usb port must be figured into your design. Having the screens semi-permenently mounted to a frame or a box that slides inside another will give you versitility. Have your class experiment with different ways to integrate screen slides and access features. Dealing with the optics will depend on your audience, there average sight capabilities and what you have to work with. Two cardboard folding viewers were used for viewer#3, one was the pixi and the other being Loreo's Lite fo upclose viewing of pictures, 8"+/-. The Pixi is for viewing monitor or pictures at about 15"+/-. Some trimming of the outbound side of the viewing hole was necessary, but placing them end to end, view-wise, gave adaquate focal capability and not too much enlargment of the screen pixils. That should get you going. Have fun and don't forget to test your folding viewers on some pictures i've assembled before you tape them in place. Order two or three of each so you can keep each project assembled. More details will follow or contact me for parts or kits or further instructions. Anyone can take 3D photographs with a single camera, all you need to do is shift your weight between shots while keep the shots parallel. Shots of animated subjects require a pair shutter sync'd cameras or video cameras. Save your video-pairs because those can be assembled into a 3D creation with software and time and you can capture still off of them for your digital picture frame. |


